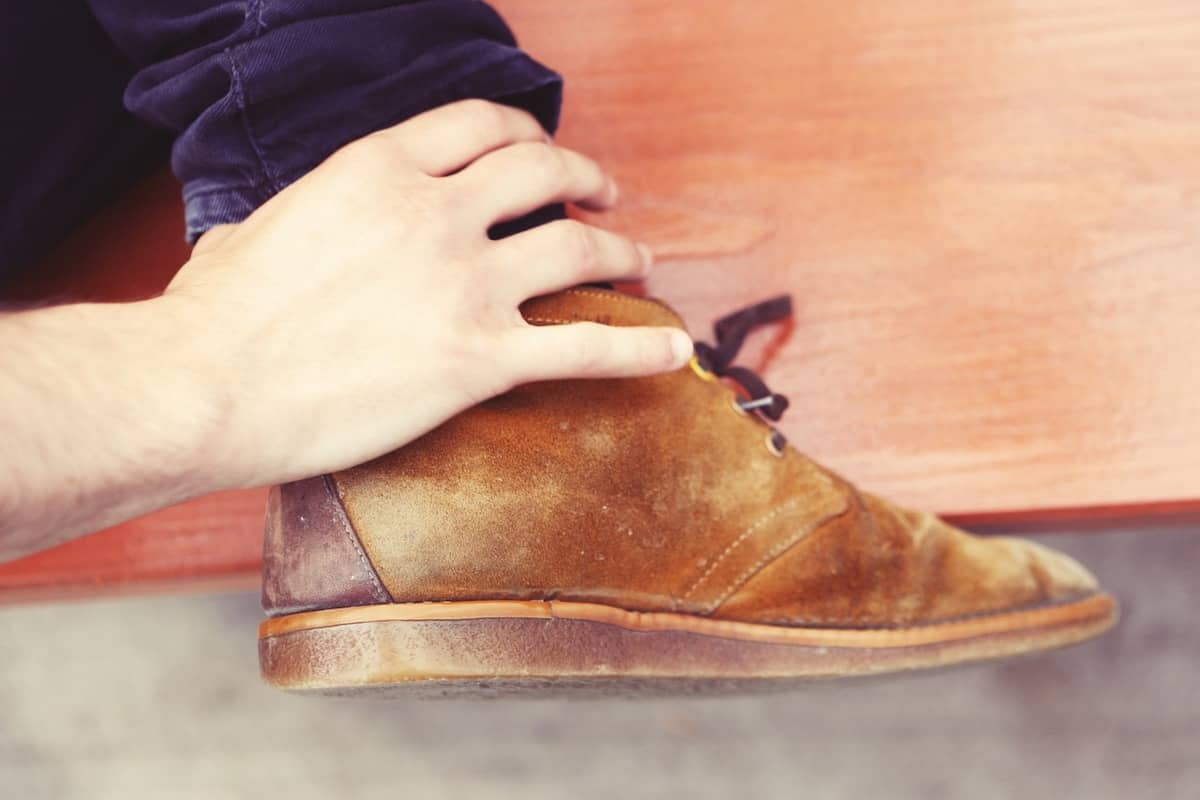
Both comfortable and stylish, suede boots are a great addition to the wardrobe and can seem too good to throw out after some wear and tear.
That’s why you should fight for your suede boots, and try your best to keep them in top shape and stay on top of minor repairs.
But what if the problem seems too large to solve? What if the boots have a hole or two and seem unsalvageable? Well, fortunately, there is a fix. Usually, a leather repair kit and a steady pair of hands should suffice.
While by no means easy, and in some cases, you’ll want to defer to an expert, it is definitely possible to salvage your holey suede boots.
How To Fix A Hole In Suede Boots
I’ll try my best to cover the best ways to go about fixing holes and other blemishes in your suede boots throughout this article, so you can keep hold of your favorite pair.
Clean The Boots and Remove Marks
I’m not saying you made it up, but in some cases, a good scrub can reveal that the hole was in fact just some general wear on the boots and quickly cleared up.
If your shoes have a W on the tag, that means you’ve got the all-clear to get in there with water and soap.
Depending on the type of mark, there are various techniques available to you.
Check for Grease
With grease, commonly from makeup items or food, you’re going to want to blot the stain with a cloth dipped in vinegar.
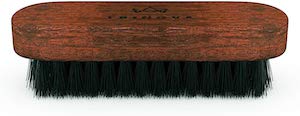
So as not to end up with a bigger mess than before, ensure you work from the outside in, then get a suede brush and go over the affected area to polish it up.
Look for Stains or Burns
For stains or even burns on the boots, grab yourself a gum eraser – from the nearest art supplies store – and rub the area gently until the staining comes up.
Fix Scuff Marks
If you’ve got scuff marks on your boots (let’s be honest, we all do), then the best thing you can use is an old toothbrush.
Yes, as strange as it may seem, a toothbrush is the recommended tool to fix scuff marks on suede.
Go over the marks with the toothbrush, and remove any dirt the same way.
Then, you can go back to using the vinegar on a cloth trick to finish the job and wipe up any remaining stains.
Brush Small Punctures
Again, when it comes to suspected small holes or punctures, you might find that in fact, they are incredibly easy to fix.
With a suede brush, you can gently go over the affected areas until they start to fade away.
Patch Up Bigger Holes
What do you do when this doesn’t work, or for bigger holes?
This is where your patchwork skills come into play. First, get a hold of some good quality fabric. Cut the fabric to roughly the size of the hole, maybe even slightly larger. Now comes the tricky part, and the need for a steady hand.
With some tweezers, place the patch of fabric inside the boot, through the hole. Now, using leather glue from your handy leather repair kit, get inside and glue the patch to the underside of the suede.
During the process, you might find it useful to have a hairdryer nearby. An odd thing to need for a suede boots repair you may think. But the hairdryer comes in handy to help the glue and speed up the process, making your life much easier.
After you have done all of this, I would recommend going over the newly patched up area of the boot with some leather protector. What this does is cover up any visible lines and makes the job seem much more professional.
If you’ve pulled it off and the boot is all patched up, but suffering from a touch of discoloration in the newly patched area, go over the area with a coat of the suede boot’s color to make it look good as new.
What You Should Avoid
Using Solvents
A common mistake made when people try to fix suede boots is thinking that they can be fixed using chemicals.
The big problem with using solvents, for example, is that while you may indeed get rid of the mark or small hole, you will also remove the color from the boot too—which is not the desired outcome I’m sure you’ll agree.
Using the Wrong Kind of Vinegar
It is worth taking into account the fact that not all vinegar is fit for purpose when it comes to taking care of your suede boots.
Some vinegar is capable of causing the boot’s texture and appearance to wear away.
For that reason, it’s fairly important that you make an effort to test out the vinegar on a patch of suede first, and see if there are any effects on the material after 20 minutes or so when it has dried.
Preventing Other Issues
Now that you’ve successfully fixed any holes or stains on your suede boots, it’s worth going over a few ways you can avoid damaging them again in future.
Bear in mind that suede is a delicate material.
This is by far the best thing to keep in mind if you’re looking to avoid damaging your shoes. Remember that suede is a very thin type of leather, and as a result, can be highly susceptible to scratching and tearing.
Being the soft and delicate material that it is, it doesn’t take much to damage suede. For this reason alone, take care not to expose your suede boots to situations when they could come into contact with loose stones or rough surfaces.
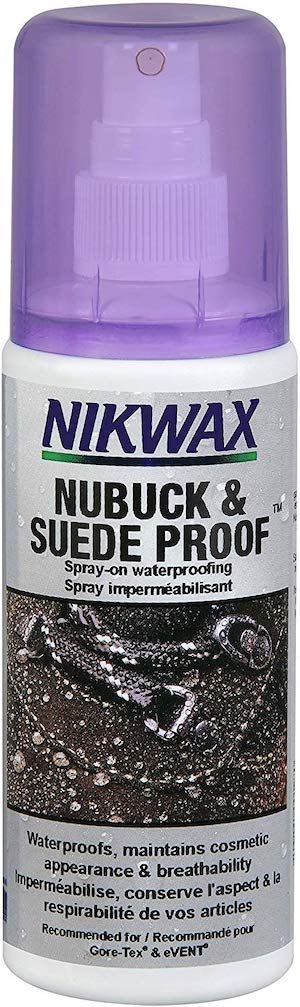
Waterproof Your Boots
Perhaps a lesser-known issue is the fact that suede shouldn’t be exposed to water. Suede boots are prone to stains and general water damage in the rain, or when walking through puddles.
Also, water can significantly affect the shape of the boots and how they fit your feet. Or even worse, lead to conditions such as athlete’s foot, if the water soaks through the boots.
That’s why you should look to waterproof your boots as soon as possible. If you want them to last throughout the fall and winter, then you’ll want to invest in a waterproof coating as a matter of priority.
If you’re lucky your boots may already be waterproof, but if not then you can easily manage it with some simple waterproofing spray.
Clean the boots up, shake the can of spray up well, and then apply an even coat all over the boots.
Once you’ve let them dry for a while, go back in for a second layer, and then you should be golden.
Once you’ve patched up and waterproofed your suede boots, maybe it’s time to think about restoring them to their former glory.
How to Restore Suede Boots
As important as it is to keep on top of any general wear and tear on your suede boots, it’s also nice to keep them looking as sharp as the day you bought them.
So using some products that you’re likely to find around the house, let’s see what you can do to spruce your suede boots up.
1. Go over the boots with a hairdryer
If your boots have laces, remove them for this part. Then, working your way over the boots with a hair dryer, try your best to get rid of any suede hairs and fluff that can make them look scruffy.
Hold the hair dryer close to the boots, and make sure you cover every inch of them for the best results.
2. Steam the boots with a kettle or iron
Using either a kettle or an iron, whichever is easiest for you, direct a heavy stream of steam towards the boots while moving them around with your hands.
What this helps us to do is restore some of the color to the boots, and give them the appearance of being new once again.
3. Use your suede brush
Get that handy suede brush that we put to good use when fixing up the boots, because you’ll need it again to polish them up.
Brushing the boots will ensure that the coat stays even and the boots will look much better as a result. It can also help get rid of stray hairs and any other undesired items sticking to the boots.
4. Iron the laces
If your suede boots happen to have laces and they are flat, then this is a great trick to keep them looking fresh.
While it may seem insignificant to keep the laces looking good, they form an important part of the look of the boots, so it’s worth giving them such extra attention.
Lay your laces out flat onto a table. Then, take your iron and go over them, smoothing them out and getting out any creases or wrinkles they may have.
Finally, thread them back into your boots and you’ll find your suede boots now look good as new!